A new Orange Unified Design System is being developed. Explore OUDS Web
Icons
Guidance and suggestions for using external icon libraries with Boosted.
How to create an icons library using Icomoon
Visit IcoMoon webapp and download orange-icons.json config file.
Create your own project
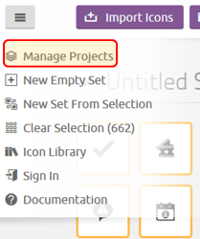
Go to the top left menu and select manage projects:
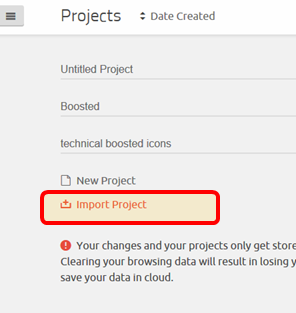
Then, select import project link and select the file orange-icons.json.
It will load all the Orange Icons into a new project.
You can now access to all the icons by clicking onto Load.

Select your icons
You will find two sets: the first one contains all the Orange Frames and Popout, the second one contains the Solaris icons.
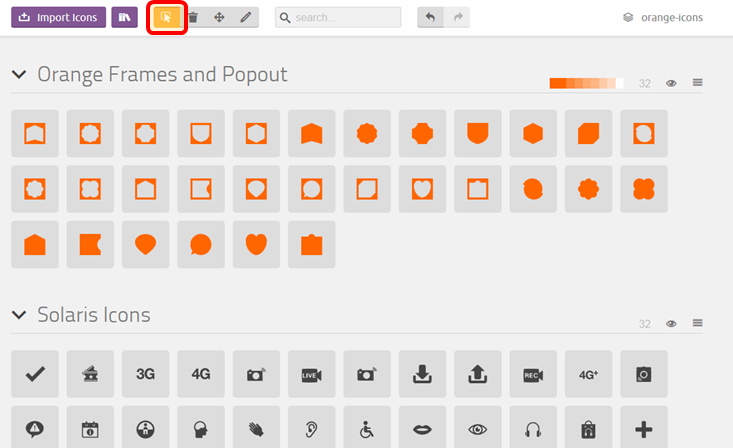
By default there is no selected icon, you can make your selection for your own project.
Check that you are in selection mode (third icon in the top bar, after import icons and
icon library), when an icon is selected, its border becomes yellow.
If you need to add a specific icon which is no present into the selection provided, create a new empty set for your project, and add icons to it.
Icons format recommendation
You need to import icons in SVG, within a square layout to preserve icons consistency; if the layout is not a square, you will have some surprises.
Download and adapt your project’s font
Now you can create your font for your project.
Click on Generate font at the bottom right of the page. Depending of the number of icons
selected, it can take some time…

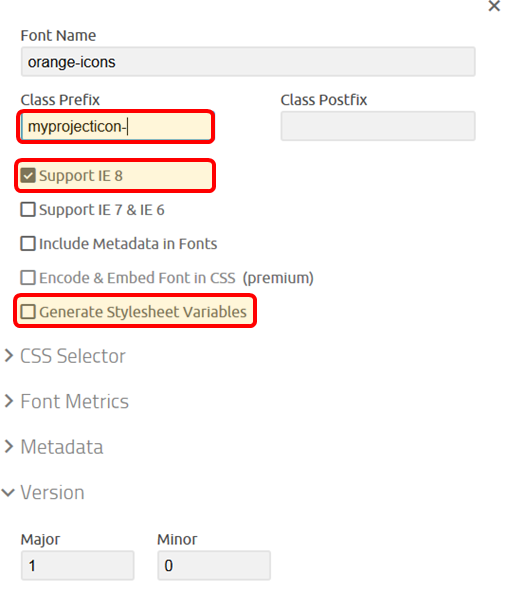
Setting your font preferences
Now you have a Download button at the bottom right but WAIT!
We know, you want to download your font but first you need to make some change into Preferences
to name your font with a name dedicated to your project.
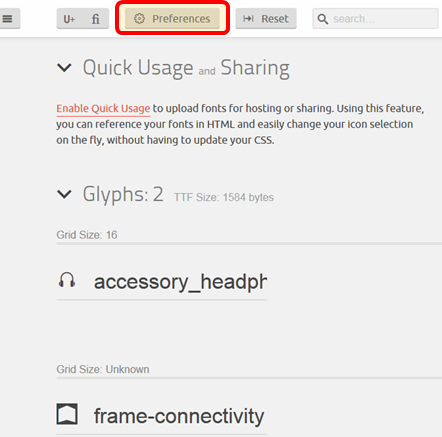
- On the top menu bar, click onto
Preferences. - Our default font-family is named
icon-orange, rename it for your project (MYPROJECT-icons or other) and customize the class prefix by adding your project name to create a unique CSS selector. - You also can get SCSS variables if you want change the version.
- And uncheck IE8 support if you rely on Boosted 4!
Close the Preferences window, you’re now ready to download your font.
The download is a zip file, MYPROJECT-icons.zip.

Unzip it.
The demo.html and demo-files folder offer a sample page displaying the icons — you
don’t need them for your project.
The fonts folder is the one you need! It contains MYPROJECT-icons.woff file.
You can next create the woff2 file using everythingfonts.
And finally the style.css file contains all the css classes.
Rename it to MYPROJECT-icons.css.
Adapt your file for SCSS if needed, you can now use your icons.